Have you ever wanted to control switch-adapted devices using Grid 3 and BJ Toybox?
This blog post will walk you through the process from start to finish, helping you set up a seamless integration of both systems.
Let’s dive in!
What are we using?
The BJ ToyBox from Qinera is a device designed to allow control of toys and appliances directly from a computer. This compact, USB-connected device facilitates the control of up to four toys or switch adapted devices, simplifying interaction with these objects. It includes four output switches that can be regulated using the provided software or through other applications such as MS PowerPoint® and Grid 3. The BJ ToyBox is user-friendly; after downloading and installing the BJ ToyBox software, simply plug the device into a computer’s USB port, connect up to 4 switches depending on your configured scenarios, and start controlling your devices. BJ ToyBox is a reliable, efficient, and convenient solution for interactive control. The BJ ToyBox is from Qinera (was BJLive!) (https://qinera.com/en/controlling-electrical-appliances/53-toybox.html) and is available for purchase via Liberator: https://www.liberator.co.uk/bj-toy-box
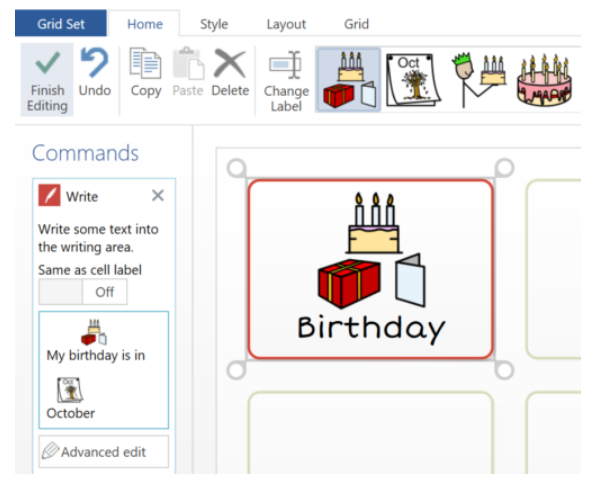
Grid 3 by Smartbox is a comprehensive, inclusive software solution designed to empower individuals; enabling communication, computer usage, and environmental control. It offers grid sets—pages of interactive on-screen buttons—that cater to varied physical abilities, supporting multiple input methods such as eye gaze, touch, switch, and voice control. Its customization options, integration with core Windows functions, access to online services, multi-language support, and extensive symbol library collectively contribute to a user-friendly experience. Equipped with realistic text-to-speech tools, Grid 3 not only facilitates effective communication but also promotes greater independence and quality of life.
Before you can start using Grid 3 with the BJ Toybox, you will need to download and install the Toybox software and drivers. Visit http://goo.gl/ApF7n to download the necessary files. Once the installation is complete, you’ll be able to use the BJ Toybox software to interact with your switch-adapted devices.
Step 2: Set Up Grid 3
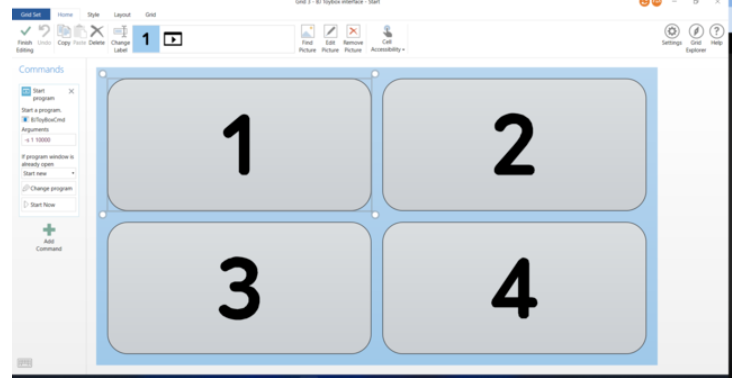
Now that you have the Toybox software installed, it’s time to configure Grid 3. Begin by opening Grid 3 and importing the online gridset “BJ Toybox interface.” This gridset has default commands already programmed to activate the devices plugged into the Toybox. Keep in mind that these commands will only work if you have installed the Toybox software and drivers (as mentioned in Step 1).
Step 3: Choose Your Desired Settings
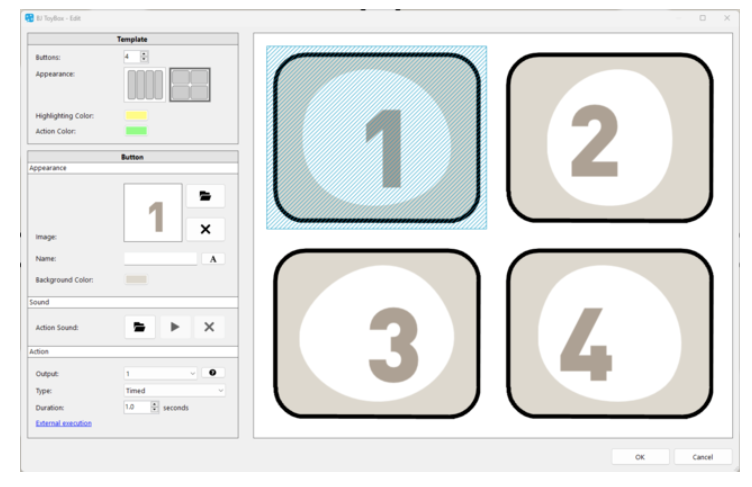
The BJ Toybox software allows you to choose between two types of actions for your switch adapted devices: latched action or timed action.
Latched action refers to a device being turned on until the button is clicked again, and off until it is clicked again.
Timed action means the device will be activated for a specific duration, which can be set between 0.1 and 60 seconds.
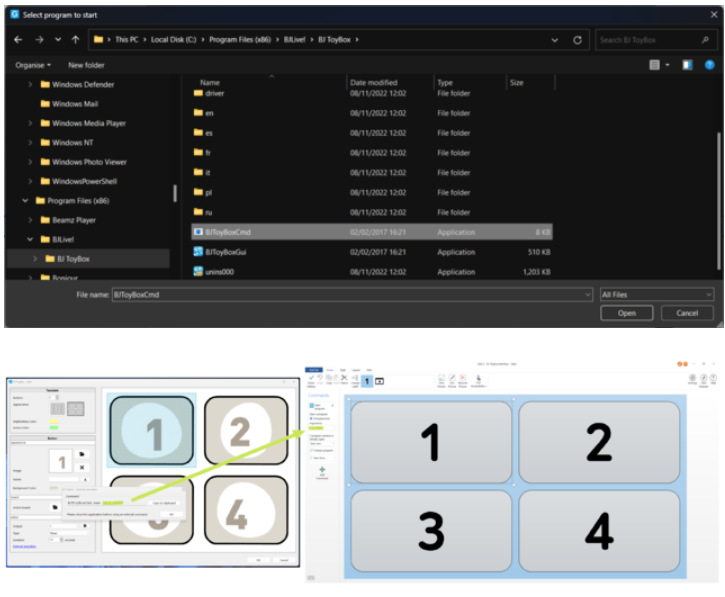
Step 4: Configure the External Execution Command
To use the desired settings with Grid 3, you will need to configure the external execution command. Unfortunately, the Toybox software doesn’t have this command built-in, so you’ll need to use the Gridset to set up the correct “argument” for the Start program BJToyBoxCmd.
To configure the cell command on Grid 3, set it to START PROGRAM C:\Program Files (x86)\BJLive!\BJ ToyBox (default install location), with “if program window is already open” set to START NEW.
Here are some examples of how to configure the arguments based on your desired settings:
Latched switch 1: -t 1
Latched switch 2: -t 2
Latched switch 3: -t 3
Latched switch 4: -t 4
Switch 1 timed for 0.1 seconds: -s 1 100
Switch 1 timed for 1 second: -s 1 1000
Switch 1 timed for 10 seconds: -s 1 10000
Switch 2 timed for 1 second: -s 2 1000
Step 5: Haptic Feedback
For haptic feedback, a short timed action would be most suitable. Configure your desired switch with the appropriate timed action setting based on the examples provided in Step 4.
Conclusion:
And that’s it! Now you have successfully set up Grid 3 to control switch adapted devices using the BJ Toybox. With the right configuration, you can seamlessly integrate these two systems and open up new possibilities for assistive technology. Happy experimenting!
Ready to explore how assistive technology can help?
Our team of experts is here to provide personalised advice and solutions. Contact us today for a friendly, no-obligation discussion about your needs.