It could be said that the global tech giants have certainly made exceptional progress in recent years to develop their devices and software to consider accessibility from the word go. Rather than finding ways to adapt an existing interface, we are seeing these options built into an ever increasing range of new off-the-shelf products – amazing!
Although the ever-increasing level and quantity of accessibility options is a massive leap in the right direction; at access: technology, we are still constantly seeking ways to give our clients the same user experience as everyone else, as universal accessibility isn’t yet 100% the norm. Personally, I would argue that reducing the number of required inputs, or the overall time taken to perform an action on a device, would be universally beneficial. Perhaps devices should be developed to be the same for all users, regardless of their access method… just a thought… That being said, at present some companies succeed more than others in their array of accessibility features, and a particular front runner (it will probably not surprise you) is Apple.
We may have a little way to go until universal accessibility is the norm, but one feature of Apple iOS certainly takes things into a more considered direction…
A Shortcut a day…
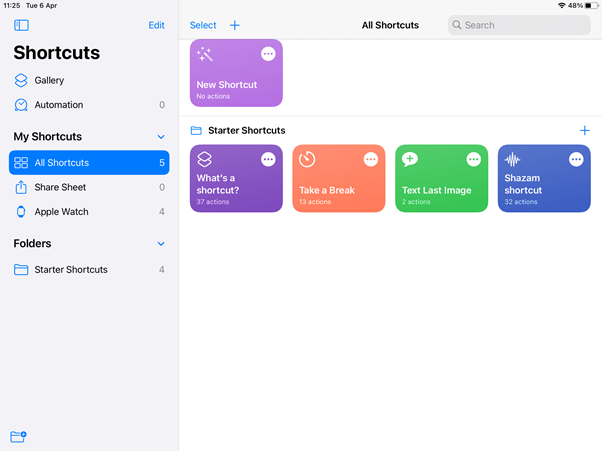
Apple IOS Shortcuts application
Apple Shortcuts are advertised to be quick solutions to automate and organise your use of iOS: triggering reminders when you arrive at a certain location, timers for brushing your teeth, or a Facetime speed dial to your nearest and dearest – actions turned into the press of a single icon, removing menu navigation and extra input for the user. What makes Shortcuts even more exciting, is that alongside a free gallery of ‘Starter Shortcuts’ within the app, the feature offers the user the ability to create their own. The interface is about as friendly as it gets when it comes to this creation process, so working through your idea is surprisingly intuitive at times. As is often the case with software, some familiarity certainly speeds things up, so I would recommend putting time into understanding the basic workflow of creating a successful shortcut if it is something you want to pursue in detail.
While the benefits of Shortcuts can be felt by all users, it can be a particularly effective way to reduce the number of switch inputs required for an action for users utilising glide or block scanning on iOS.
What is Glide Scanning you may ask? For users that do not access their device by touching the screen, a switch offers an alternative method of pin pointing down a selection on the display. Guidelines move across the screen firstly from left to right, and await user input to identify where they wish to select; from here, the guideline moves up and down, again awaiting the user to determine the selection. The user creates a crosshair to make their choice on the screen, which works as a great access option (though this can be a little more laborious than directly accessing a device.) One ‘touch of the screen’ equates to four switch inputs for those using glide scanning, and depending on the location of that selection on the screen, it can take some time to close in on your target. Four times as many selections for one input certainly adds up over time, so Shortcuts can become particularly useful.
You can explore Shortcuts by opening its App (see image above.) Here, you’ll see shortcuts and automations as options to view. While these two perform very similarly, automations can be set to perform actions without being directly triggered; instead they use any number of prompts to action such as a time, location, audible input or phone call. It’s a whole world of its own, and one I’ll dive into in another post, but for now, let’s have a nosy at Shortcuts…
How do you like them Shortcuts…
Shortcuts: opening up the App for the first time may show you some example Shortcuts to get you started!
Let’s have a look at one of the Starter Shortcuts’ – in this case ‘New note with date’. When you select this from within the app, you’re asked ‘What would you like to write?’, and presented with the on-screen keyboard to add in the detail of your note (for added functionality, try selecting the microphone icon on the bottom right of your keyboard and dictating instead!). Once you’re finished adding some text, select ‘done’ and you’ll be brought to your note, within the Notes app, dated and timed as you selected, and with your input text too.
Now, let’s make things even more convenient, and place this shortcut onto our homescreen. This time, instead of selecting the colourful box of the shortcut, select the three dots to the top right corner instead. This opens up the detail, and lets you edit the shortcut if required. From here, we select the three dots again to the right hand side, and you’ll then see ‘Add to Homescreen’. Select this, give it the name you’d like and hit ‘Add’ – sorted!
If we were to write the same note without a shortcut, it would have taken two inputs (minimum) to start a new note, a further twenty-seven to write the time and date, and two more to create new lines to start typing. With each saved input, you’re also reducing the overall time taken to do this action, and by simplifying the process, we can provide a more efficient and independent method for those with alternative access needs.
Hopefully that example starts to demonstrate the fundamentals of Shortcuts, and inspires you to have a bit of a browse through the gallery to see how else we can simplify some tasks in iOS.
A Shortcut for Launch
Before we delve into some specific user cases that access: technology have been asked to explore for our clients, I’ll mention one other little trick which is a brilliant bonus to your Shortcut skillset.
Meet Launcher!
Launcher is a free app built to customise your iOS home screen, and launch apps automatically. There’s a whole lot that can be done with it, but for now I’m going to talk about one such function. For most shortcuts, the goal is often to ‘end up’ in a specific app, be it Notes, Facetime or otherwise. Now, thinking again to our users who are using a switch to access their devices, a convenient place to be between tasks is the homescreen. Multiple inputs can be required to get back to the homescreen; Launcher helps here, by giving your shortcuts the ability to automatically return to home screen view – super helpful indeed.
All we need to do to prepare, is simply download Launcher from the App Store and open it up on your device. Once you’re in the app, navigate through the setup menus until you reach the main dashboard of the app – no account required! And that is it for the app itself, you can close out of it and hide it away on your home screen if you so wish.
When it comes to building it into the Shortcut, let’s think about the creation process as a whole. I’ve been asked to explore a few user cases for some of our clients so far that I thought I would share two of these with you. Both written and video instructions follow this process below.
Case Studies:
Case Study 1: The Flash Indicator
The aim here was to provide a way for our client to indicate that they wanted to answer a question in the classroom via their iPad. Given that their classmates used the visual prompt of raising their hand, I went for an equivalent visual approach for this solution.
Quick Note: While the camera on all iPhones does have a flash, it is only the newer iPad pros that carry this functionality.
You’ll be presented with some options, and a search function.
Select ‘Scripting’ and scroll until you see the ‘Device’ Subheading.
Close to the bottom you should see ‘Set Torch’ – select this and it will appear on the right hand side of your display!
Your display should read ‘ Turn Torch On’, as below,
NOTE: You have the option here to change these inputs.
‘Turn’ is highlighted to give you an additional option to toggle between on/off, or to ask you each time what input you would like.
‘On’ can be changed to ‘off’, which is where the next input comes on.
On the left of your screen, you should still see the ‘Set Torch’ option – select this again and it will appear as a new input on the right of your screen, underneath the other. Here, select the word ‘On’ so that it changes to ‘Off’.
Congratulations, we have a single flash of light!
From here, you can duplicate this process to create multiple flashes of light, follow the same steps and watch your inputs stack – selecting ‘on’ and ‘off’ in sequence.
In the search bar on the left side, type in ‘URL’ – from the options you will see, select ‘URL’ and it will appear under your shortcut inputs on the right. You will see that there is faded highlighted text displaying ‘apple.com’ as a default – select this and type the following in its place:
Launcher:\\homescreen
Back to the left side search bar, this time type in ‘Open URLs’ – and select ‘Open URL’s from your options. Again, this should now be seen under your previous inputs on the right hand side, the result of which should look like this:
Congratulations! We have a self-closing Shortcut to use!
Step 4 & 5 can be used in all of our shortcuts as your ‘auto-home’ function, so just apply the same process at the end of your custom shortcut for the same result.
Case Study 2: ‘How am I Feeling?’
In this example, the aim was to find a way to provide a quick method for our user to monitor their feelings, as part of an Emotional Regulation programme. Each Zone was given a shortcut on the Homescreen, which required our user to select – and from here the Shortcut did the rest. If ‘Happy’ was selected from the Homescreen, then a Calendar entry was created at the current time to say ‘Happy’. We can even add the location in too, for added information gathering, and set all of this to appear in its own iOS calendar so as not to clutter up others that may be in use. Let’s have a look at how this was created …
Open the Shortcuts app, and select ‘Add Shortcut’. You’ll be presented with some options, and a search function.
Using the search box, type ‘Calendar’, and select the Calendar App icon which appears. Select ‘Add New Event’ and it should populate onto your Shortcut page.
The blue faded ‘Title’ text can now be changed to be the text you would like to appear in your calendar entry, in this case ‘Happy’.
The default time and date options in faded blue can be changed by selecting each, and choosing the ‘Current Date’ option which appears below (both of these should be changed to ‘Current Date’.
Select ‘Show More’ to bring further options. Here you can choose which of your iOS calendars you’d like the event to be added to. On this page, switch off the green switch titled ‘Show compose sheet’ to the off (white) position.
In the search bar on the left side, type in ‘URL’ – from the options you will see, select ‘URL’ and it will appear under your shortcut inputs on the right. You will see that there is faded highlighted text displaying ‘apple.com’ as a default – select this and type the following in its place:
Launcher:\\homescreen
Back to the left side search bar, this time type in ‘Open URLs’ – and select ‘Open URL’s from your options. Again, this should now be seen under your previous inputs on the right hand side.
This clip shows you the functionality of the resultant shortcut; adding the calendar entry called ‘Happy’ at the moment it was selected, to the iOS calendar.
As the Apple iOS continues to evolve with every update, I’m confident that Shortcuts will only become more powerful. Stay tuned for a few more of my favourite use cases for this nifty feature on future posts!
Ready to explore how assistive technology can help?
Our team of experts is here to provide personalised advice and solutions. Contact us today for a friendly, no-obligation discussion about your needs.