Andrew in his latest blog post has already covered this in some good detail, but I feel this is such an important element of implementing Assistive Technology, I’m going to go through it again.
“Visual Clutter” is the term I’ve used to describe the unnecessary content that cloud a user’s screen, and therefore impedes their cognitive thinking process.
The brain sees all this junk, and has to make an active effort to actively sift through it, parsing it as nonsense. It’s hard enough for a neuro-typical adult with 100s of notifications and adverts to focus on a task — near impossible for a child with a brain injury.
Our job is to make access to the world of technology easier.
This tagline says it all really…
“Don’t Make me Think”
Here, unfortunately, is an all-to common scenario: you’ve got seated correctly, provided with a shiny new laptop, established a minimal–effort access method, loaded a suitable piece of accessible software for recording your work, listened and understood a teacher’s instruction, constructed a sentence in your head, started the process of writing it down onto your laptop when…
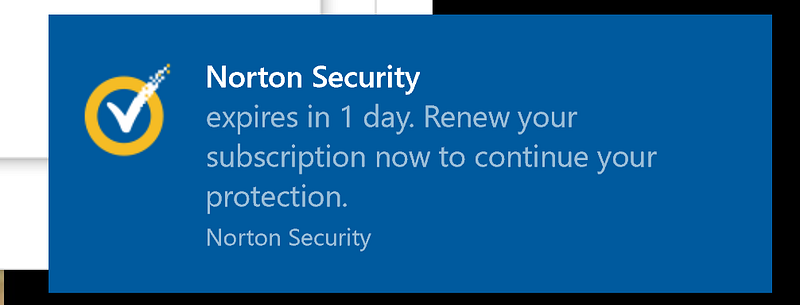
Wait, what? I have a Norton subscription? That’s about to expire? I won’t be protected…!
Total visual and cognitive distraction for the user and support staff.
A visual distraction, that with a just little effort is completely unavoidable! I cannot begin to stress just how important spending the time in correctly setting up a user’s device is. I’m incredibly passionate about ensuring solutions are well-executed, which for me means front-loading the work and properly thinking about and preparing a device before implementing it. Our entire role boils down to minimising effort, which includes cognitive load.
For this post, I’ll be focusing on Windows device as they are the worst culprit, but the principles can remain the same for any device.
So, how do we properly prepare a laptop for use, so that the user isn’t constantly distracted and cognitively drained?
Top Tip no. 1 — Wipe it!
At Access: technology north, my consultants are under strict instruction that any laptop that comes through the door is immediately wipedbefore it’s even turned on!
Windows devices, come with a horrendous collection of junk apps, known as ‘bloatware’. Anti-virus software is the worse culprit for pop-ups (and slowing down your PC) — and completely unnecessary in today’s world as Windows 10 has a built-in, superb, anti-virus (called Defender) that is completely unobtrusive! Add on top of that links to Dropbox, Snapfish, and a whole host of other things you didn’t ask for, and the first time you turn on your brand new shiny PC, you’ve got a pile of unwanted adverts and applications cluttering up your desktop.
The only exception we’ve found is Microsoft’s Surface Pro range — as they seem to be mostly bloatware free.
You can get away without wiping your device, and removing the junk later — but I promise you, wiping it is significantly quicker and much more effective.
Wiping a device is a little tricky, and if you’re not careful, you’ll just be restoring the manufacturers default image with all the junk anyway, so whilst maybe not for the fainthearted, if you want to give it a go, our method is to:
Get a blank 16GB USB drive
On any other Windows device, create a Windows 10 install drive using the media creation tool, and then put it in your laptop’s USB port.
Boot your shiny new laptop from the USB (HP hit F9 on startup, Dell hit F12 and select your USB)
Select — ‘Custom: install Windows’
Delete all hard disks until Drive 0 Unallocated Space — this prevents the original manufactures image being used by mistake
Follow the rest of the install instructions
Disclaimer: You can on occasion temporarily end up with no WiFi doing this, as the Windows install doesn’t carry all WiFi drivers. The trick is to then connect your laptop to your router using a cable (and with today’s slim laptops, you’ll probably need a USB to ethernet adaptor), and once you run Windows update, you’ll be back up and running.
Top Tip no. 2— Turn off notifications
I have copied most of this section from Andrew’s recent post, but as it’s super important, it felt necessary to reiterate here:
You are constantly being notified about what all of your open programs are doing, what Windows is doing in the background, what Windows is going to do ‘later tonight’, which updates that software you forgot you had needs etc etc etc.
Here’s how to turn them off.
Press the windows key or start menu and type ‘Notifications and actions settings’ (you actually probably only need to type ‘Notif’ before it knows what you’re after…) and turn them all off. I haven’t had notifications on for years and my computer is yet to implode and I haven’t missed anything important, although I suppose I wouldn’t know if I had…
Then type UAC and set that down to ‘never notify me’ — this just stops your computer from warning you about changes to settings within your account. If you feel a bit funny about this one you can scale it up a bit and ask to be notified ‘sometimes’ if you’re really not sure, perhaps have a chat with someone who you trust to help you decide. Again, I don’t have them on and I think I’m doing OK.
Top Tip no. 3— Still more junk to hide!
So, you’ve wiped your laptop and got a beautifully clean ‘vanilla’ Windows 10 install…
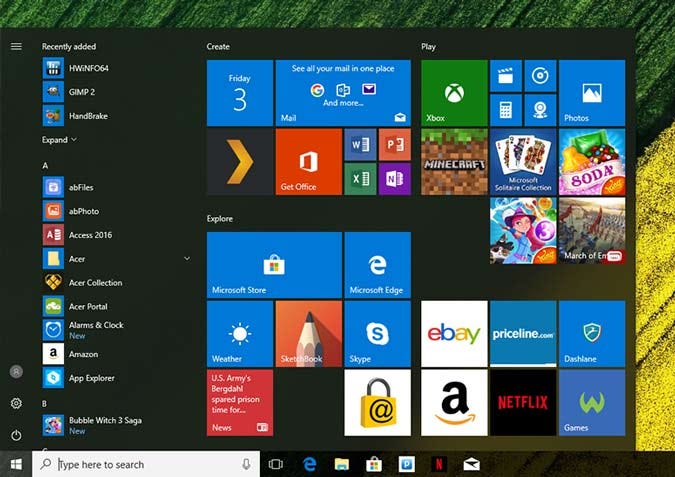
So, what on earth is Candy Crush Saga doing on my Start menu?!
A new laptop’s start menu. So much clutter!
Most of our users will only ever use 3 or 4 applications, so let’s just display those ones to minimise their choice making.
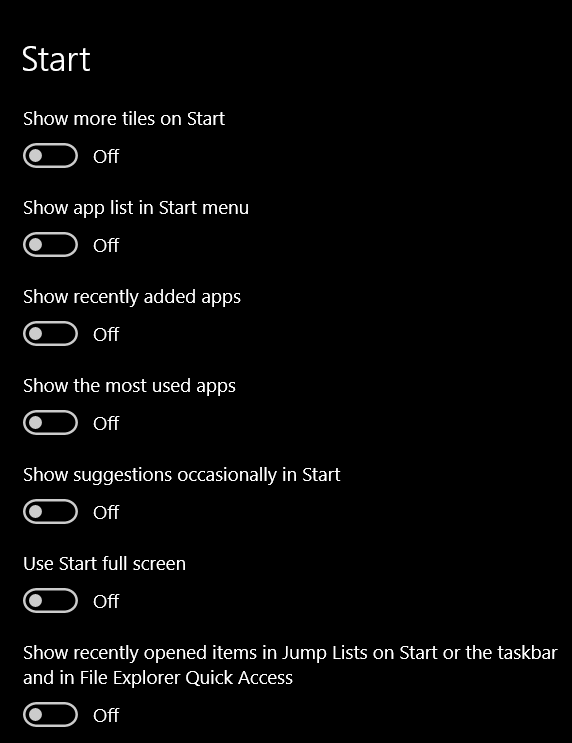
First, load the ‘start settings’ (click Start and type ‘start’ to locate these) and just turn it all off.
Them, right click every app on your tile start menu and either uninstall if you doubt you’ll ever use it, or unpin from start.
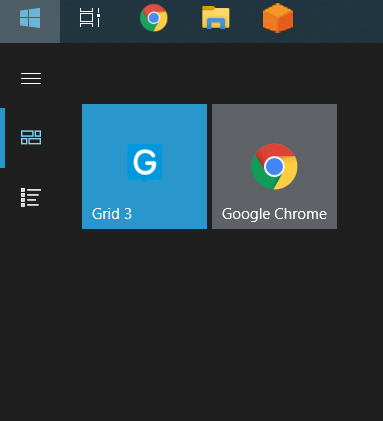
Now, for the 3 or 4 apps you will actually use (Word, Chrome, Grid 3 etc) — search for them (click Start and just type their name), right-click and ‘pin to start’
Much better.
Top Tip no.4 — still even more to hide…
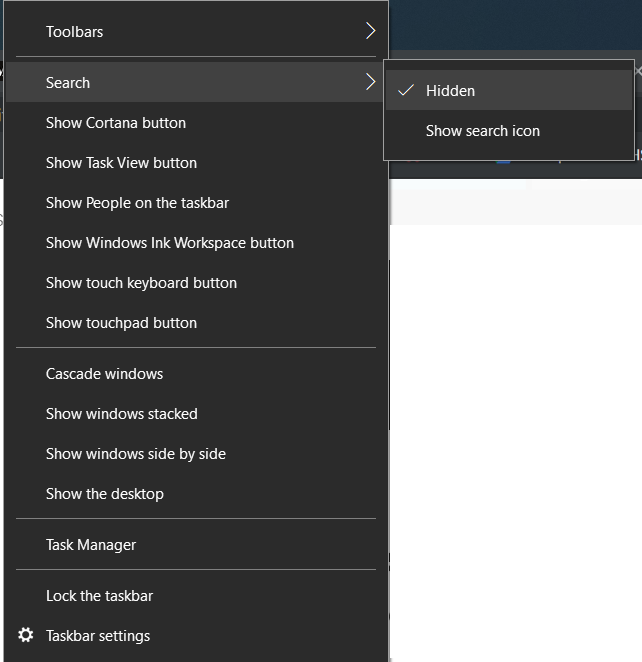
Windows Ink workspace anyone? Cortana? The People button?? (I literally have no idea what this is even for..)
My tip. Hide the lot.
Right click the task bar, and go through each option until it’s all gone.
You can always bring them back should you need, but it’s generally unlikely.
Once you’ve done these 4 steps, the whole Windows experience is far cleaner and much, much less effortful to endure.
Top Tip no.5— Adblocking
The Internet is generally a painful, inaccessible experience due to amount of adverts …except for our clients, because we just hide them!
I happened to browse the Internet with my adblocker off for the first in years last week, and had forgotten what an advert infested wasteland it actually is!
It’s simple to sort, and makes a HUGE difference, not in only in terms of making online content easier to process and navigate- but also by reducing the likelihood of those pesky deliberate/accidental clicks that lead us down those online black holes.
For further information about assistive technology please don’t hesitate to get in touch with us at mike@accesstechnology.co.uk. You can also get future updates, follow and contact us via Facebook, Twitter and Instagram.
Ready to explore how assistive technology can help?
Our team of experts is here to provide personalised advice and solutions. Contact us today for a friendly, no-obligation discussion about your needs.