Before I begin, I’d like to emphasise that I don’t work for Crick nor do I (or we as a company) have any professional affiliation with them, I just think they’re really, really good.
For those who are unfamiliar with Clicker, it is a child-friendly word processor that’s jam-packed with assistive features to facilitate extended writing and help to develop literacy skills, available on Windows, Mac and iOS. It offers voice feedback, predictive text, symbol support and handy little voice-notes to assist with the writing process and then a whole myriad of ‘Clicker sets’ that can be tailored meet the individual learning needs of each user – more on those later. In terms of accessibility (which is what I’m here for) it has both EyeGaze and Switch functionality built in and everything about it seems to have been designed with this in mind. We often come across software that is great for ‘standard access’ but that we have to find lots of work-arounds and hacks to make it work for alternative access methods. From and end-user perspective, there’s an awful lot to be said for a seamless experience and feeling as though the software is for them as much as it is for everyone else (and they don’t need to run two extra bits of software and plug in 3 additional wires to make it work).
Access Methods
The switch access is exactly as you’d like it to be as a switch user. You have the option of using one or two switches and a whole host of ways to make it work for you including timings, automaticity and sound/visual highlighting.
Switch settings
The keyboard, Clicker Sets and prediction tool are scannable so the user has full access of everything Clicker has to offer – this doesn’t include the menu bar at the top however. So if you make use of switches for all elements of computer access we may need to look at this again.
Clicker’s ‘EyeGaze access’ is just ‘dwell-to-click’ for the mouse cursor rather than in-built compatibility with the EyeGaze camera itself so it relies on a system that allows your EyeGaze camera to control your mouse. Tobii Gaze point and Windows 10 Eye Control both do this for free and computer control functionality is built into the Grid 3 and Communicator software – chances are if you are already using EyeGaze, you’ll be able to access Clicker.
This setting also removes the need for a left click with other access methods, you only need to be able to move the cursor to where you want to click and allow the software to dwell and click for you – I have found this especially useful for joystick users who have difficulty moving between their joystick and a switch and could equally be used with other mouse-emulating hardware. This both speeds up the typing process and is less fatiguing for the user as we are letting the software do part of the work for us.
SuperKeys!
SuperKeys
Having a ‘favourite thing’ about a piece of writing software is a perfectly normal thing to admit to, and this is mine. If you’re using Clicker via any means other than a physical keyboard (and even then in some cases), the likelihood is that you’ll need to interact with either the pop-up keyboard on the screen or a Clicker Set that has been setup for you to complete your work. SuperKeys works by increasing your target area when you go to type a letter or input a word thus minimising the number of mis-hits you encounter. So, rather than requiring absolute accuracy with your cursor, your finger or your eyes – you click in the general area of the item you’re aiming for which then expands that section giving you a much larger target. Although this is technically more effort (two hits rather than one) which is not something we’d normally advocate, ask any of the kids I work with whether they would rather work a little slower and not make an avoidable mistake or save the hits and be constantly going back and editing, I know which they’d choose, every single time.
Mouse dwell and SuperKeys at work
Another feature also at play in this example is the rather wonderfully named ‘wobble distance’. Once a dwell has begun (demonstrated by the appearance of the red shrinking dot) the user is allowed an element of ‘wobble’ whereby the cursor can move without restarting the process. It is set to ‘within the cell’ by default which means you don’t need an iron stare or surgeon-esque steady hand. This is a great example of how Clicker removes barriers to the success of our users – ultimately they are here to do some writing so how good they are at looking in one place for a long time shouldn’t really be a factor.
Keyboard options
The ‘rainbow keyboard’ groups the letters by colour (as above) which not only looks pretty, it helps the user to learn the layout of the keyboard and works really well with SuperKeys – this is one of a few keyboard options that also include alphabetical and frequency layouts. The frequency layout arranges the keys by most commonly used letters starting in the top left corner – if you’re using a switch to scan the keys and it starts from there every time, this is an amazing time saver.
Frequency Keyboard
Regardless of the keyboard layout you choose, you have the option to jazz it up with the ‘rainbow’ setting should you wish, as mentioned before this works really well with SuperKeys and, for similar reasons, is great for supporting users in their typing. Rather than having to point or try to explain the location of a letter on the keyboard – we’ve all been there “it’s in the middle, no…down a bit, next to d, no that’s b! ” etc. the rainbow overlay quite neatly groups your letters by colour so there’s never more than 7 letters to choose from once you know which colour to look at.
Supporting features
Prediction tool used within the document
Regardless of how you are accessing the software, the tools available to help with the writing process in Clicker are great too. The spell-checker and prediction tools can be used both for our early-literacy users and as a means of speeding up the typing process or lessening the keystrokes required for those who know what they want to say but have a hard time getting it down quickly. The particularly nice thing about these in Clicker are that they benefit from all the same accessibility features as the rest of the software; so you get the symbol support, you can listen to the word before you choose it (just right click anything on Clicker and it is spoken aloud) and it’s clickable using mouse-dwell or switch scanning.
Prediction panel rather than in pop-up
The prediction tool can be used as a pop-up alongside your writing, attached to the on-screen keyboard or as a separate panel to the left of the document – the latter being an addition to Clicker 8 which is really useful for those who struggle with visual clutter where they are working.
Another really useful, and perhaps underused, feature of Clicker is its voice notes. If you have a user who can tell you what they want to write in lots of detail but as soon as it comes to writing it down draws a blank – this could be of some use. Alternatively, if you find yourself needing to provide lots of prompts regarding a sentence or paragraph this tool can also be utlised here. It brings up a simple ‘Record/Play’ bar where you can capture the information needed at the side of the page – whether this is the entirety of the spoken content the user has come up with themselves or simply a couple of words as a reminder (What happened at the park?) it increases the independence of the user as they then have all the information they need to complete that part of their writing. Working with clients with brain injuries, we find that short-term or working memory difficulties are commonplace; using voice recorders in this manner is a practice as old as the hills (as my Grandad would say, who is incidentally, as old as the hills). So incorporating it straight into the software makes a lot of sense, removing the additional dictaphone or BigMac switch from the desk that we always forget to change the batteries in or lent to the teacher down the corridor and haven’t seen since before half term…
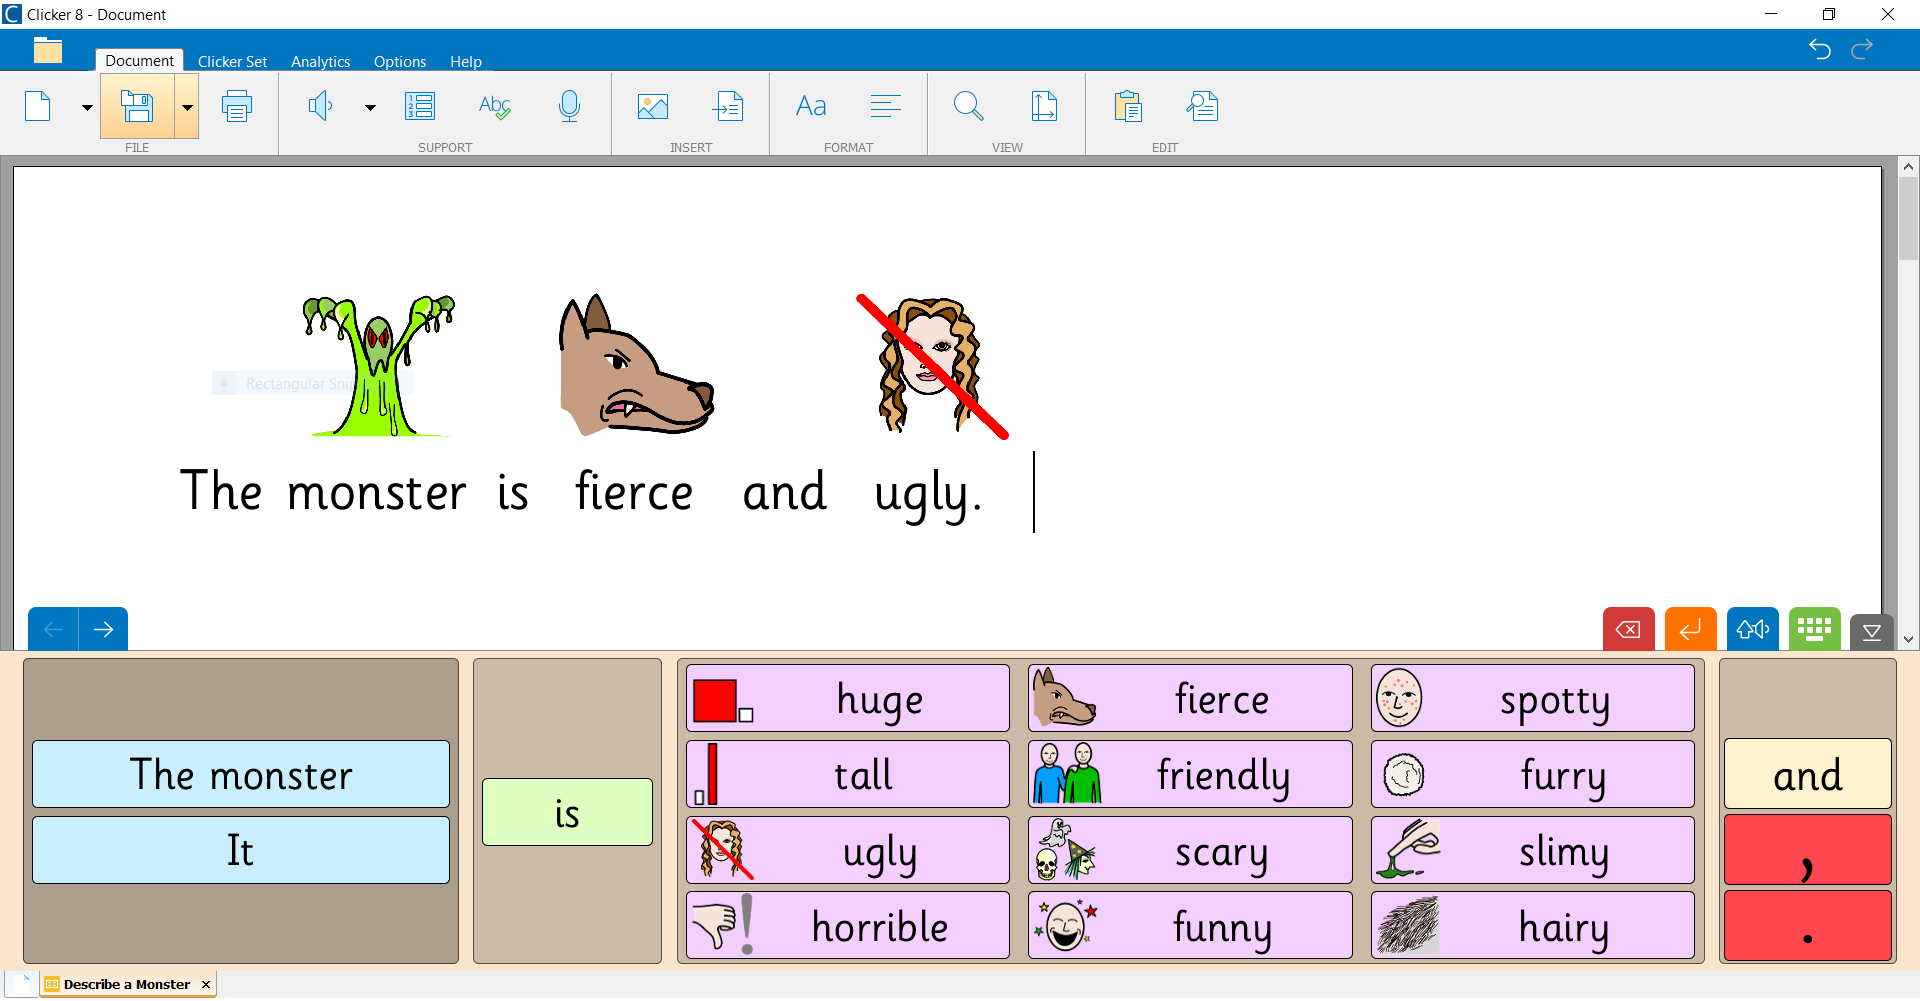
Clicker Sets
There are so many components to Clicker Sets that they could feasibly have an entire post dedicated to them. They consist of ‘writing grids’ ‘planning boards’ and the mysteriously named ‘more’. The writing grids provide structured support for the creation of writing – giving the user the option of words from which they can compose their sentences. The planning boards are just that, a space in which to capture ideas before commencing a task – think mind-map, brainstorm or ‘thoughtshower’ (apparently). The ‘more’ category has three Clicker Sets in it: Talk Set, Matching Set and Custom Set – I have found these to be the forgotten 3rd cousin of the Clicker Set family.
All of the writing grids appear at the bottom of your document for reference throughout your work. Sentence Sets provide the entire sentence which the user must reconstruct – this can be with visual prompts that handily disappear before they’re allowed to click anything, a permanent visual support that allows the user to match their sentence to the one provided or with an auditory cue – meaning the user can constantly listen back to the sentence as they are constructing it.
Connect sets allow a little more freedom on the part of the user as they are given options on how to construct their sentence, perhaps with alternative sentence openers or adjectives with varying levels of relevance. They are all entirely editable and, as ever, come with the symbol support and auditory feedback if required. From an accessibility perspective, the grid layout lends itself perfectly to switch scanning and the whole lot works with our old friend SuperKeys so every element is available to all users.
Analytics
After all of this wonderfulness has been used and the work is complete, Clicker 8 now includes it’s extremely useful ‘Analytics’ tool. This one is for the educators amongst us. It breaks down how each document has been written by the user, taking into account the use of spell-check, prediction, Clicker Sets and anything sneakily pasted in from elsewhere. It even goes as far as to tell you how many letters were typed before the predictor tool was used.
I didn’t do most of this work myself…
I find that this is useful on two counts. Firstly, when assessing the work completed, there are occasions where we need to check how much of someone’s work is their own – amazing things can happen when someone knows how to copy and paste! We can also assess the progress being made from one piece of work to the next, from improvements in the spelling of key words to the incremental changes in the reliance of the user on support – often progress is difficult to identify over such short periods but this tool certainly supports this. Secondly, when we need to see that our users are making use of everything available to them. If I were to use this to look at the writing of one of my guys and it showed up that they’d used the keyboard exclusively for their whole 9 page story, I’d be asking questions of those supporting them as to where the prediction tool was whilst all this was going on, why didn’t they have a word bank for all the new vocabulary taught as part of this topic? Not that I make a habit of checking up on the practice of my colleagues, but it’s nice to know that I can…
In summary, I love Clicker. Anyone can use it and even if they don’t necessarily need all of the bells and whistles it offers, I think it’s so important that they can.
Check out the help section of their website for a more in depth look any of the features I’ve mentioned here (and plenty that I haven’t)
Ready to explore how assistive technology can help?
Our team of experts is here to provide personalised advice and solutions. Contact us today for a friendly, no-obligation discussion about your needs.